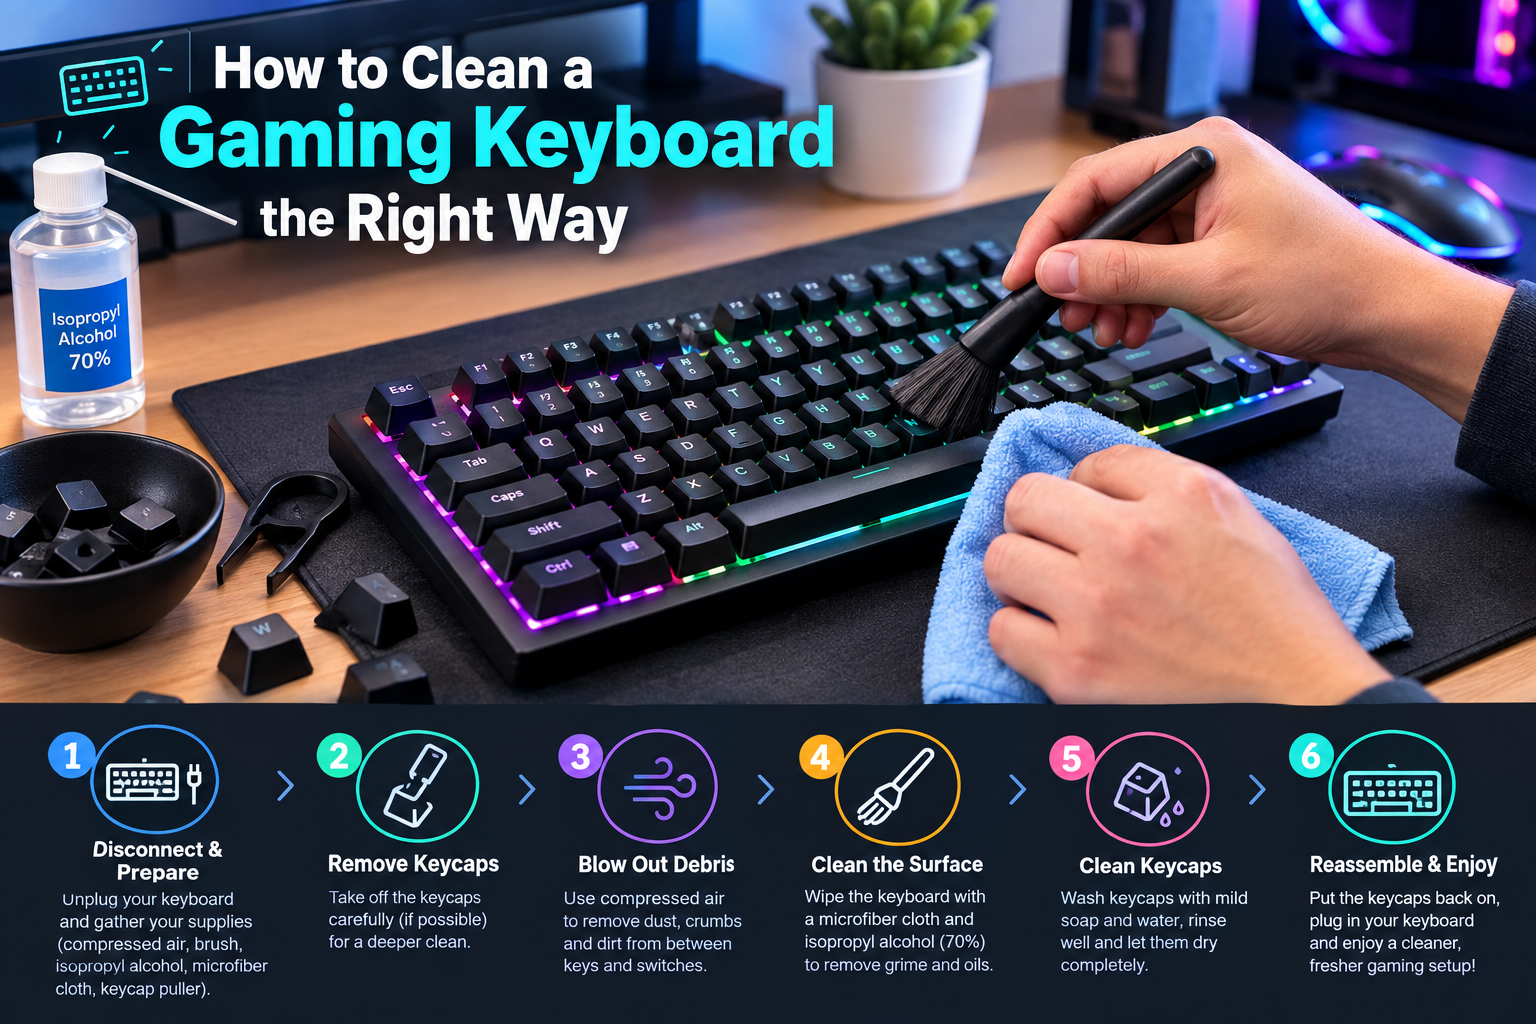
There is nothing worse than sitting down for a long gaming session and noticing your keys feel sticky, mushy, or just plain gross. If you have been gaming for a while, you already know how fast a keyboard can turn into a graveyard for crumbs, dust, skin oils, and whatever else ends up on your desk. Most people put off cleaning it because they think the process is complicated or risky. It is not. Once you do it the first time, you will wonder why you waited so long.
This guide covers everything from a quick five-minute surface clean to a proper deep clean that takes your keyboard back to the way it felt on day one. It does not matter if you have a mechanical keyboard, a membrane board, or something wireless. By the end of this, you will know exactly what to do and what to absolutely avoid.
Why Cleaning Your Gaming Keyboard Actually Matters
A lot of people treat keyboard cleaning like something optional, something you do when it gets visibly disgusting. But there are real, practical reasons why it matters.
Gaming keyboards, especially mechanical ones, rely on individual switches for every single key. When dust, debris, and oils get inside those switches, the keys start to feel scratchy and inconsistent. You might notice a key that needs a harder press to register, or one that feels wobbly and mushy. That is not a cheap keyboard problem or a worn-out switch problem in most cases. That is a dirt problem.
Beyond performance, there is the hygiene side. Keyboards are one of the most bacteria-dense surfaces in any gaming setup. You touch your keyboard after eating, after touching other surfaces, sometimes even with unwashed hands after coming in from outside. Bacteria, sweat, and skin oils build up over time on the keycaps and between the keys. Regular cleaning keeps that under control.
Then there is longevity. A gaming keyboard is not a cheap purchase. Taking care of it means it lasts longer and continues performing the way it should. Gunk that builds up inside switches and around stabilizers wears things down over time. Regular maintenance prevents that.
What You Will Need Before You Start
You do not need a special cleaning kit. Most of what you need is already in your house, and the rest is cheap and easy to find online or at a hardware store.
Here is what to grab before you start:
A can of compressed air is probably the single most useful tool for keyboard cleaning. It blows out dust and crumbs from spots your fingers can never reach. Get one with a thin straw nozzle for better control.
Isopropyl alcohol at 90% concentration or higher is what you will use for disinfecting and cutting through oils. Do not use regular 70% rubbing alcohol. The higher water content in that stuff can potentially damage electronic components if you are not careful. Stick to 90% or above.
Cotton swabs, also called Q-tips, are perfect for getting into tight spaces around and between switches. You will use these a lot.
Microfiber cloths are gentle enough to wipe down surfaces without scratching them. A couple of these will handle most of the surface cleaning.
A keycap puller is a small tool specifically designed for removing keycaps without cracking or chipping them. You can get one very cheaply online and it makes the process significantly easier and safer than trying to pry caps off with your fingers or a screwdriver.
A small bowl or container, warm water, and a drop of mild dish soap round out the list. These are for soaking your keycaps during a deep clean.
Quick Clean vs Deep Clean: Knowing Which One You Need
Not every cleaning session has to be a full teardown. There are two levels of cleaning, and which one you choose depends on how dirty things have gotten and how much time you have.
A quick surface clean takes about five to ten minutes. You do this regularly, maybe once a week or once every two weeks, to stop grime from building up in the first place. It handles the surface-level dust and fingerprints.
A deep clean is the full process where you remove every keycap, soak them, clean the entire base, and put everything back together. This should happen every two to three months if you use your keyboard heavily, or every six months if you are a more casual user. Once a year is the absolute minimum if you want to keep things running well.
How to Do a Quick Surface Clean
This takes almost no time and makes a visible difference. Do this regularly and your deep cleans will be much less daunting when the time comes.
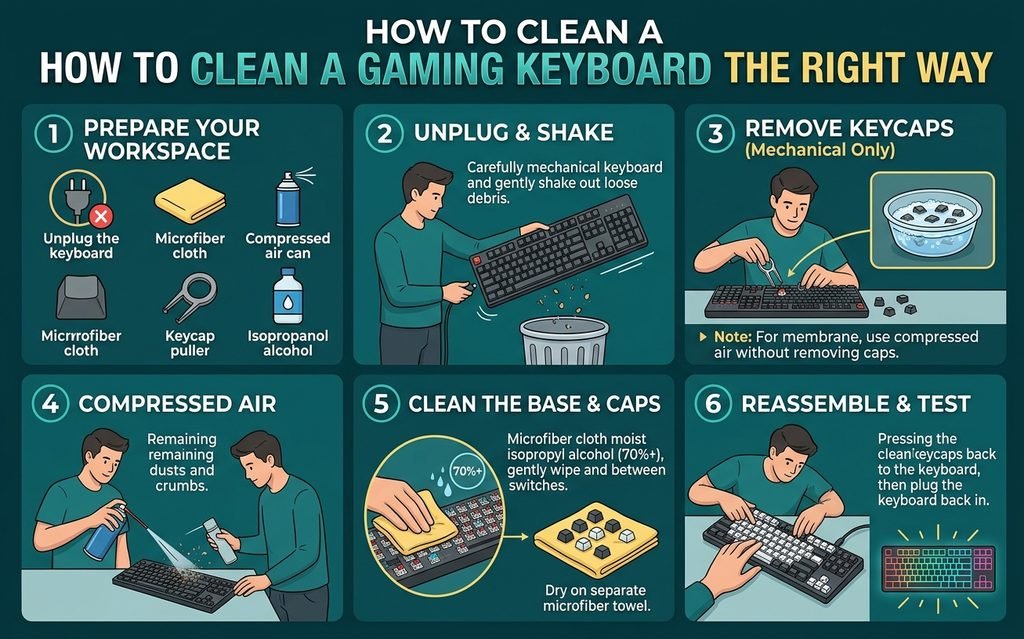
Start by unplugging your keyboard. If it is wireless, switch it off. Never clean a keyboard that is still connected to power, especially if you are using any kind of liquid.
Hold the keyboard upside down over a trash can and give it a firm but gentle shake. You will be surprised what falls out. Crumbs, hair, dust, and all kinds of debris that has been hiding under your keys will come loose. Do this a few times.
Now take your can of compressed air and blast between the rows of keys. Hold the can at an angle rather than pointing straight down, and use short bursts. Moving from one side of the keyboard to the other in a consistent pattern works best. This pushes debris out rather than just shifting it around.
After the air blast, take a dry microfiber cloth and wipe down the entire surface. Get the tops of the keycaps and the spaces between them as much as possible.
For a slightly deeper surface clean, dampen a microfiber cloth very lightly with isopropyl alcohol and wipe down the keycaps again. Do not soak the cloth. You want barely damp, not wet. This cuts through the skin oils and light grime that builds up on the tops of your most-used keys, things like WASD, space, shift, and the number keys.
That is the quick clean. Simple, fast, and effective for regular maintenance.
How to Do a Full Deep Clean
This is the complete process. Set aside an hour or two when you are not in a rush, because doing this right takes a bit of patience.
Step One: Disconnect and Document
Unplug your keyboard or turn it off if wireless. If you have a wireless board, go ahead and remove the batteries too.
Before you pull a single keycap, take a clear photo of your keyboard layout. This sounds like an obvious step but people skip it all the time and then spend twenty minutes trying to remember where every key goes during reassembly. One photo from above solves that completely.
Step Two: Remove the Keycaps
Use your keycap puller to remove every keycap from the board. Place the puller over a cap, squeeze gently, and pull straight up with a smooth consistent motion. Work one row at a time to stay organized. Drop them all into your bowl as you go.
For larger keys like the spacebar, enter key, backspace, and shift, there are metal bars called stabilizers underneath. Be extra gentle with these. They are attached differently from regular keycaps and you can feel the extra resistance when pulling. Pull slowly and evenly without tilting the cap to one side.
Step Three: Soak the Keycaps
Fill your bowl with warm water and add a small drop of mild dish soap. Put all your keycaps in and let them soak for 30 to 60 minutes. The warm water and soap loosen up all the oils, grime, and buildup that has accumulated over months of use.
After soaking, give each cap a gentle scrub with your fingers or a soft brush. Rinse them thoroughly under clean, running water until there is no soap residue left. Lay them all out on a towel in a single layer to air dry.
This is important: do not put the keycaps back on until they are completely dry. Completely. Even a little moisture trapped under a keycap can cause issues with the switches underneath. Give them at least a few hours, or longer if you can. Do not use a hair dryer or heat source to speed this up. Heat can warp or deform plastic keycaps.
Step Four: Clean the Keyboard Base
With all the keycaps off, you have full access to the board. This is where you will see the real mess that has been building up.
Hit the entire base with compressed air first. Get between every switch, into every corner, and along every edge. Hold the can at an angle and use short controlled bursts. You want to push debris out of the keyboard, not deeper into it.
After the air treatment, take a cotton swab dipped lightly in isopropyl alcohol and go around the base of each switch. The sides and tops of the switches collect a surprising amount of gunk. Be thorough but gentle. You are not scrubbing hard, just wiping away the buildup.
For the flat surfaces between the switches and around the edges of the board, use a lightly dampened microfiber cloth with isopropyl alcohol. Wipe everything down and let it dry for a few minutes.
Check your stabilizers while you are in there. If they look sticky or gunky, you can clean them with a cotton swab and alcohol. If your spacebar or enter key has always felt scratchy or rattly, the stabilizers are often the reason, and cleaning them makes a noticeable difference.
Step Five: Reassemble
Once the keycaps are fully dry and the base has had time to sit after its alcohol wipe-down, it is time to put everything back together.
Pull up the photo you took before you started. Press each keycap back onto its switch with a firm straight-down push until you feel or hear it click into place. Work row by row so you do not mix anything up.
For the larger keys with stabilizers, line up the keycap carefully before pressing down. You may need to feel for the stabilizer bars to seat properly.
Once everything is back on, plug the keyboard in and test every single key. Open a text editor or use an online key tester and press each one to make sure it registers. This is also a good time to check that no keycap feels loose or crooked.
Cleaning a Membrane Gaming Keyboard
Most of this guide applies to mechanical keyboards, but if you have a membrane board the approach is a bit different. Membrane keyboards use rubber domes under the keys rather than individual mechanical switches, and they are generally not designed to be taken apart the same way.
The safest approach for a membrane keyboard is a thorough quick clean rather than a full teardown. Flip it upside down and shake out debris, blast with compressed air, and wipe down the surface with a lightly dampened microfiber cloth. If your membrane keyboard does have removable keycaps, you can pop them off carefully, but the rubber membrane beneath is fragile, so be much more cautious than you would be with a mechanical board.
Avoid soaking any part of a membrane keyboard in water. The construction is less forgiving and the chance of water getting somewhere it should not is much higher.
What Not to Do When Cleaning Your Gaming Keyboard
Knowing what to avoid is just as important as knowing the right steps.
Never spray any liquid directly onto the keyboard. Always apply cleaning solution to your cloth or cotton swab first, then wipe. Spraying directly onto the board risks liquid getting into switches and circuits.
Do not use bleach, ammonia-based cleaners, or harsh household chemicals. These damage both the plastic of the keycaps and the electronics inside the board. Stick to isopropyl alcohol and mild dish soap.
Avoid using paper towels on keycaps and switches if you can help it. They can leave tiny fibers behind and some paper towels are rough enough to cause very light surface scratching on the keycap legends over time. Microfiber cloths are better.
Never put keycaps back on while they are still damp. The moisture can get into the switches and cause problems, or simply make the keys feel weird for a while. Wait until they are fully dry.
Do not skip the photo before removing keycaps. It sounds unnecessary until you are sitting there holding a spacebar and genuinely unsure where that extra unlabeled key goes.
How Often Should You Actually Clean It
A quick surface wipe with a microfiber cloth can realistically be done once a week as part of your desk cleanup. It takes maybe two minutes and keeps the buildup manageable.
A compressed air blast between the keys every couple of weeks is a good habit, especially if you eat near your setup.
A full deep clean with keycap removal and soaking should happen every two to three months for a heavily used gaming keyboard. If you use it less intensively, once or twice a year is fine.
If you have allergies or are particularly conscious about hygiene, cleaning more frequently is always fine. The process is gentle enough that doing it monthly will not harm your keyboard at all.
Tips to Keep Your Keyboard Cleaner for Longer
Once you have done a fresh deep clean, you probably want to keep it that way for as long as possible. A few simple habits make a real difference.
Wash your hands before gaming. This is one of the biggest factors in how fast your keyboard gets dirty. Oils, food residue, and dirt from your hands transfer directly to the keycaps and switches.
Avoid eating over your keyboard. Crumbs are the number one cause of debris buildup inside keyboards, and they are genuinely difficult to get out without a full deep clean.
A keyboard cover or dust cover is worth considering if your setup sits out when not in use. These soft covers sit over the board and prevent dust from settling in between gaming sessions.
Best Ideas
Cleaning a gaming keyboard is not complicated. It is just one of those things that feels more intimidating than it actually is. Once you have done it once, the whole process becomes pretty natural and you will probably find yourself doing it more regularly just because of how good the keyboard feels afterward.
The quick clean handles your day-to-day maintenance. The deep clean brings everything back to life a few times a year. Both are worth doing, and neither requires any special expertise or expensive tools.
Your keyboard takes a lot of abuse. A little care goes a long way.