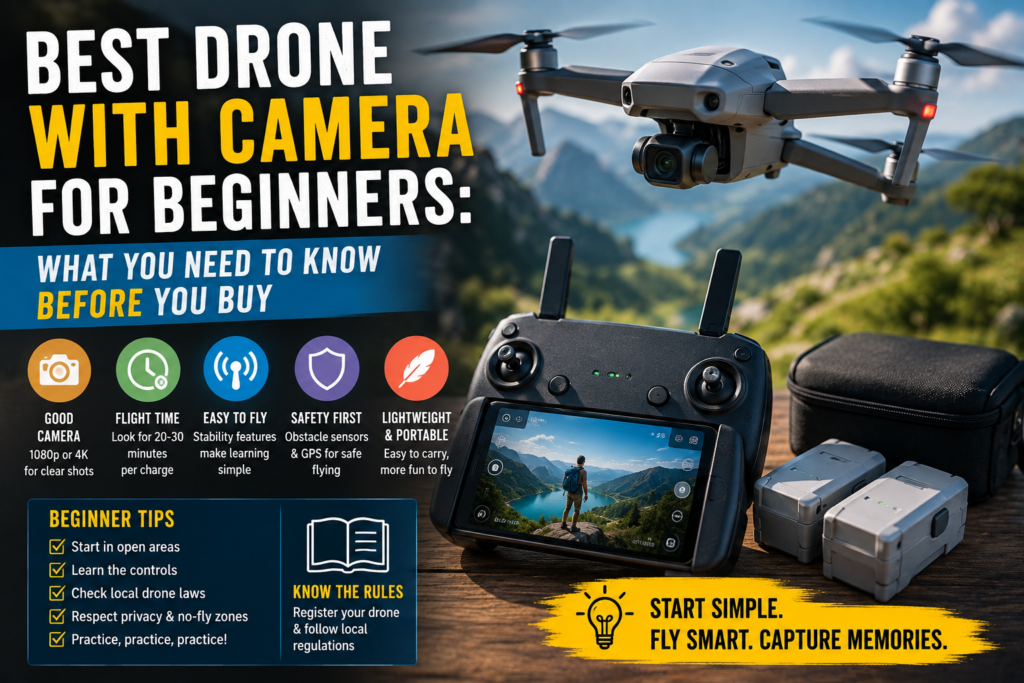
There is a feeling that is hard to describe the first time you fly a drone. The camera lifts off the ground, climbs maybe thirty feet into the air, and suddenly you are looking at a version of the world you have never seen before. Your backyard looks like a map. A lake you walk past every morning looks enormous from above. A crowded parking lot reveals a geometry of lines and shapes you never noticed from ground level. That shift in perspective is what makes drones so compelling, and it is also why so many people who have never considered aerial photography before are now genuinely curious about getting into it.
The problem is that the drone market is not easy to navigate. There are dozens of options across a massive price range, and the specifications are written in the same dense technical language that confuses every first-time buyer. Terms like omnidirectional obstacle avoidance, three-axis stabilized gimbal, sub-250g weight class, D-Log M color profiles, and OcuSync transmission get thrown around like everyone already knows what they mean. Most people do not, and most buying guides do not take the time to actually explain.
This article does. By the end of it, you will know exactly what to look for in your first drone, which cameras matter at which price points, what the rules are in the United States, and which specific drones are worth your money in 2026.
Why Drones Are Different From Every Other Camera
Before getting into any recommendations, it helps to understand what makes buying a drone fundamentally different from buying a camera or any other piece of technology.
When you buy a camera, you are essentially making a creative and financial decision. When you buy a drone, you are also taking on a degree of legal responsibility. Drones are classified as aircraft by the FAA (Federal Aviation Administration), and that means the moment your drone leaves the ground in the United States, you are operating in regulated airspace. The rules are not overwhelming or complicated, but ignoring them can lead to real consequences, including fines that start at thousands of dollars.
The other thing that sets drones apart is that learning to fly them requires actual practice. A camera produces better photos when you understand how to compose an image. A drone produces better footage when you understand how to move it smoothly through the air, how to judge distance and height, how to read the wind, and how to anticipate what the camera is seeing. None of this is difficult, but all of it takes time and experience. The best first drone is the one that makes that learning process less stressful, not more.
Both of these realities, the legal side and the learning curve, should inform every buying decision a beginner makes. They are why certain features matter much more for new drone pilots than the specification sheets would lead you to believe.
The 250-Gram Rule: The Single Most Important Thing to Understand Before You Buy
If you only take one piece of technical information away from this article, make it this: the weight of your drone determines how much paperwork and regulation you are dealing with before you ever take off.
In the United States, the FAA requires that any drone weighing 250 grams or more (about 0.55 pounds) must be registered before it is flown outdoors. Registration itself is simple and inexpensive, costing five dollars and taking roughly ten minutes at the FAA’s DroneZone website, and you need to renew it every three years. But drones that exceed the 250-gram threshold also face more airspace restrictions in certain areas and draw more regulatory attention overall.
Drones that weigh under 250 grams are exempt from the registration requirement for purely recreational flying. That single fact has shaped the entire consumer drone market in 2026, because it means a sub-250g drone is lighter on paperwork, lighter on stress, and in many places lighter on the restrictions about where you can fly. This is why DJI built an entire product line around staying below that weight threshold, and it is why almost every recommendation in this guide falls under 250 grams.
One important nuance: even if your drone weighs under 250 grams, you are still required as a recreational pilot to pass the TRUST test, which is the FAA’s free online safety training for drone hobbyists. It takes about twenty minutes to complete and is available at the FAA website. You also must still follow all airspace rules, avoid flying near airports without authorization, and never fly over people or moving vehicles. Being under 250 grams means fewer requirements, not no requirements.
If you ever plan to use your drone footage for any kind of commercial purpose, including selling it, using it in a monetized YouTube channel, or doing real estate photography for clients, you will need to register regardless of weight and obtain a Part 107 certification from the FAA. That certification involves a written knowledge test at an approved testing center, but it is achievable and opens up significantly more opportunities to fly professionally.
What Actually Makes a Drone Good for Beginners
Now that the regulatory piece is clear, here is an honest breakdown of the features that genuinely matter when you are choosing your first drone with a camera.
GPS stabilization is the most important safety feature a beginner drone can have. GPS-equipped drones know exactly where they are in the sky. They hover in place without drifting even when there is no input from the controller. They know where they took off from, so if you lose signal or panic, you can hit a button and the drone flies itself back home and lands. Without GPS, hovering requires constant manual correction, and a beginner will find this extraordinarily difficult in any kind of wind. Every drone recommended in this guide has GPS. If a cheap drone you find online does not mention GPS, that is a significant red flag.
Obstacle avoidance sensors are the feature that separates an expensive beginner drone from a budget one, and the difference in stress they eliminate is dramatic. These sensors use cameras or other detection systems to see obstacles in the drone’s flight path and stop or reroute the drone before it hits anything. Entry-level drones typically have no obstacle avoidance, or only have it in one or two directions. Mid-range drones have it in multiple directions. The best sub-250g drones now have omnidirectional sensing, meaning the drone can detect obstacles from any direction. For a beginner still learning how to judge distance and depth while looking at a screen, obstacle avoidance can be the difference between an embarrassing but harmless learning moment and a very expensive crash.
The gimbal is the mechanical stabilization system that keeps the camera level and smooth regardless of how the drone moves. Without a gimbal, footage shot from a drone would be a shaky, nauseating mess. A three-axis gimbal, which compensates for pitch, roll, and yaw movements, produces footage that looks like it came from a professional production. This is one of the things that separates dedicated drones from strapping a GoPro to a toy quadcopter. A good gimbal is non-negotiable in any serious beginner drone.
Sensor size and camera quality matter, but not as much at the beginner stage as you might expect. The gap between a 1/2-inch sensor and a 1/1.3-inch sensor is real, but it primarily shows up in challenging conditions, specifically low light and high-contrast scenes. In good daylight, most modern drone cameras at every price point produce footage that looks genuinely impressive and far beyond what a phone can capture from the ground. The bigger jump comes when you move to a full 1-inch sensor, which is what the most advanced sub-250g drones now carry, and the difference there is substantial for anyone serious about image quality.
Flight time is consistently more limited than manufacturers lead buyers to believe. When a drone is listed with a maximum flight time of 34 minutes, that number assumes ideal conditions, mild temperatures, no wind, and gentle flying without rapid changes in direction or altitude. In real-world conditions, expect 20 to 25 minutes of usable flight from most consumer drones. This means a spare battery is not optional, it is essential, and the “Fly More Combo” bundles that include multiple batteries represent much better value than buying batteries separately later.
Wind resistance is closely tied to weight. A very light drone, like something under 150 grams, will be pushed around noticeably in even moderate breezes. This is the honest downside of the ultra-lightweight drones that have become popular. They are incredibly easy to carry and fun to fly in calm conditions, but they become unstable and hard to control when the wind picks up. This is worth knowing before you buy, not after.
The Best Drones with Cameras for Beginners in 2026
DJI Neo 2: The Best Entry Point That Actually Delivers
At $249 or less depending on when you catch a sale, the DJI Neo 2 is the most approachable drone DJI has ever made, and it represents a genuinely significant step forward from the original Neo that launched in 2024. At just 135 grams, it is impossibly small and light. You can hold it in one hand, launch it from your palm without a controller, and let the built-in AI tracking keep it focused on you automatically while you walk, run, or ride.
What makes the Neo 2 work as a beginner drone is everything about how it is designed to be used. You do not need a remote controller to operate it. The drone launches from your palm, responds to voice commands through the connected DJI Fly app, and can follow you around autonomously using subject tracking. QuickShot modes, which include dramatic preprogrammed flight patterns like Dronie, Circle, Helix, and Rocket, produce cinematic-looking shots with a single button press. These automated modes do the hard flying for you while you figure out the basics.
The biggest upgrade from the first Neo is the addition of omnidirectional obstacle avoidance. The original Neo had no obstacle sensors, which meant it would happily fly into a tree while following you. The Neo 2 can now detect obstacles in multiple directions, which is a significant safety improvement for beginners who are still building spatial awareness while flying.
The camera shoots 4K video at 60 frames per second, which is a noticeable improvement over the original Neo’s 30fps cap. The video quality is good for social clips and casual content, though the 1/2-inch sensor is smaller than what you find on the Mini line, and it shows in low-light conditions or when compared side by side with higher-end models. For flying outdoors in daylight and capturing the world from above for the first time, it is more than capable.
The trade-off to be aware of is battery life. The Neo 2’s batteries deliver around 18 to 20 minutes of real-world flight, which feels very short once you are airborne. The Fly More Combo, which includes three batteries, is a much better starting point than the base package. Also worth noting: if you want serious range beyond about 50 meters, you will need to add the RC-N3 controller, as phone-only control over Wi-Fi has a very limited range.
DJI Mini 4K: Best Budget Drone for True Beginners
The DJI Mini 4K sits at around $299 and is the entry point into DJI’s Mini ecosystem, which is the most popular consumer drone lineup in the world for very good reasons. The name is straightforward: it shoots 4K video on a three-axis mechanical gimbal, it weighs under 249 grams, and it is genuinely simple to fly even for someone who has never touched a drone controller before.
What the Mini 4K delivers for its price is remarkable. The three-axis gimbal produces footage that is smooth and stable in calm to moderate conditions. The GPS holds the drone in place with precision that would have seemed impossible for a consumer drone a decade ago. The DJI Fly app, which serves as the controller interface and flight computer, is well-designed and straightforward enough that most beginners are making their first flight within ten minutes of unboxing.
The honest compromises are worth understanding clearly. The Mini 4K does not have obstacle avoidance sensors, which means if you fly it toward something without noticing, it will hit that thing. This is manageable as long as you develop good situational awareness, but it does mean your first flights should happen in open, unobstructed spaces where there is room for error. The camera sensor is smaller than the step-up models in DJI’s lineup, and the color profiles available are more limited, meaning less flexibility in post-processing. There is no ActiveTrack subject following, so the drone will not autonomously keep the camera on you as you move.
For a beginner who wants to learn to fly, understand how drones work, and get genuinely good aerial footage on a limited budget, the Mini 4K is the most sensible starting point in the market. Buy the Fly More Combo, which includes multiple batteries and a charging hub, because you will want the extra flight time immediately.
DJI Flip: The Best Drone for Social Media and Content Creators
The DJI Flip, priced at around $439 for the base bundle, is a fascinating drone that sits between the simplicity of the Neo and the photography focus of the Mini line. It was designed explicitly with content creators and social media in mind, and the specific design choices DJI made reflect that focus in interesting ways.
The Flip has the same 1/1.3-inch CMOS sensor as the much more expensive DJI Mini 4 Pro, which means the image quality is genuinely excellent. It shoots 48 megapixel stills and 4K video at 60 frames per second with 10-bit color in D-Log M, which gives editors significant latitude to grade the footage in post-production. The fact that you get this camera quality at this price point is a genuine achievement.
The drone’s design is unusual. It folds in a way that protects the propellers within the body, making it more resistant to minor bumps and easier to transport in a bag. The propeller guards are integrated, which means it is safer to fly indoors and around people than a drone with exposed blades. It can be operated without a controller, launched from the hand, and controlled via the DJI Fly app, or used with a traditional RC controller for more precise flying.
The main trade-off versus the DJI Mini 4 Pro, with which it shares a sensor, is obstacle avoidance. The Flip only has forward and backward sensing, while the Mini 4 Pro has omnidirectional avoidance. For beginners flying in complex environments with obstacles on multiple sides, that difference matters. The Flip also cannot physically rotate its camera to shoot native vertical video, meaning a quality crop is used for portrait-format content instead of the full sensor resolution.
For someone who wants excellent camera quality, portability, and a drone they can comfortably operate without becoming a serious pilot, the Flip is an outstanding choice. For someone who wants to grow their skills and eventually fly in more challenging environments, investing a bit more in the Mini 4 Pro makes sense.
DJI Mini 4 Pro: Best All-Around Beginner Drone for Serious Photography
The DJI Mini 4 Pro at approximately $759 for the standard kit is where the beginner drone market gets genuinely serious about photography. It has a camera and set of features that were previously only found on much more expensive drones, all in a body that still weighs under 249 grams, stays under the registration threshold for recreational flying, and folds small enough to fit in a jacket pocket.
The camera uses the same 1/1.3-inch sensor as the DJI Flip, capable of 48 megapixel stills and 4K video at up to 100 frames per second, which gives you smooth, detailed slow-motion footage that looks genuinely cinematic. Crucially, the Mini 4 Pro’s camera can physically rotate to shoot native vertical video at full resolution and full quality, including 4K at 60 frames per second. For anyone creating content for Instagram Reels or TikTok, this matters more than it might initially seem, because the full sensor is used for vertical shooting rather than a cropped portion of it.
What really sets the Mini 4 Pro apart from the cheaper options is the obstacle avoidance system. It has omnidirectional sensing, meaning it detects obstacles from the front, back, sides, and below. This is the safety feature that gives beginner pilots genuine confidence to focus on the creative side of flying rather than constantly watching for hazards. The ActiveTrack 360 subject following is the most sophisticated tracking available in a sub-250g drone, and it works remarkably well for following subjects through moderately complex environments.
Flight time on a single battery is realistically around 25 to 28 minutes in typical conditions, and the transmission range using DJI’s O4 system is 20 kilometers, which is far beyond what any recreational pilot would ever use but speaks to the robustness of the signal connection.
If your budget allows for it, the Mini 4 Pro is the drone that most beginners who are serious about photography and video should start with. It grows with you as your skills develop, the image quality is genuinely impressive in almost any condition, and the safety features reduce the likelihood of a costly crash while you are learning.
DJI Mini 5 Pro: The Best Sub-250g Drone If Budget Is Not a Constraint
The DJI Mini 5 Pro, released in late 2025 and priced at $799 for the base kit, is the most capable drone ever made under the 250-gram weight limit. It carries a 1-inch CMOS sensor, which is the same class of sensor that professional cinema drones were using just a few years ago. The image quality difference between the Mini 5 Pro and everything below it in this guide is visible and meaningful, especially in challenging light.
The 1-inch sensor delivers dynamic range that is genuinely impressive. Sunsets, backlit subjects, high-contrast scenes where the sky is very bright and the foreground is in shadow, all of these are situations where a larger sensor recovers detail that a smaller one simply loses. For anyone who plans to sell their footage, use it in professional productions, or print aerial photography at large sizes, the Mini 5 Pro justifies its cost.
Beyond the sensor, the Mini 5 Pro’s obstacle avoidance uses LiDAR sensors in addition to optical cameras, which gives it detection capability that functions in lower-light conditions where optical-only systems start to struggle. The camera’s gimbal can rotate 225 degrees, enabling Dutch angle shots and true portrait-format vertical video at full resolution. Flight time in real-world conditions is around 30 to 35 minutes with the standard battery, and the Fly More Combo’s three batteries give you well over an hour of combined flight.
One important caveat worth understanding: the Mini 5 Pro’s published weight is 249.9 grams with a measured variance of plus or minus 4 grams. This means some individual units weigh slightly over 250 grams, which technically places them in a registration-required category under FAA rules. DJI acknowledges this variance. For most recreational pilots, this is a minor concern, but it is worth being aware of before your first flight.
For a beginner who knows from the start that they want to take aerial photography seriously, who wants the best possible image quality in the most portable package available, and who is willing to invest at this level, the Mini 5 Pro is the right drone. Its capabilities are genuinely professional, and in a body that still weighs under 250 grams in most configurations, that is a remarkable achievement.
The Truth About Battery Life That Nobody Mentions
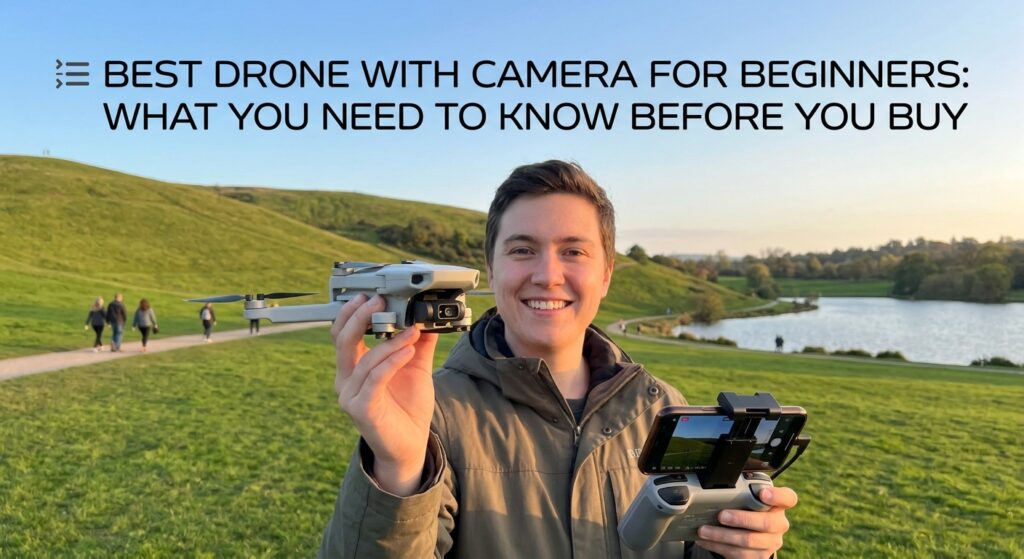
Every drone manufacturer lists an optimistic maximum flight time. DJI’s listed flight times, like most in the industry, are measured in ideal laboratory conditions, no wind, mild temperature, smooth slow flying, fully charged battery, and minimal camera work. Real-world flying looks nothing like that.
In actual flying conditions, you can expect to get about 65 to 75 percent of the listed flight time before you should consider landing. The reason to avoid draining a battery completely is not just that you need time to fly back, but that lithium batteries used in drones are healthiest when they are not discharged below about 20 percent charge regularly. Consistently running them to zero shortens their lifespan significantly.
This means that a drone listed with 34 minutes of flight time will give you roughly 20 to 24 minutes of practical flying before the battery indicator and app warnings are telling you to come home. In that 20 minutes, you can accomplish a surprising amount if you have a shot plan in mind. But if you are the kind of person who likes to explore and linger in the air without rushing, you will want multiple batteries immediately.
The Fly More Combos that DJI offers for all of its drones include two or three extra batteries along with a charging hub. At the time of purchase, these combos are almost always better value than buying the base kit and then purchasing batteries separately. Start with the combo.
What to Expect From Your First Flights
The first few times you fly a drone with a GPS stabilization system, you will be struck by how easy it is to hover and maintain position. That is the GPS doing most of the work. Do not mistake this for proficiency. GPS-stabilized hovering is passive. Actually flying the drone, moving it smoothly through the air, panning the camera at the right speed for usable footage, and composing interesting aerial shots takes practice.
Most beginner pilots find that truly comfortable control comes after roughly five to ten hours of flight time across multiple sessions. The early flights should be in open, unobstructed spaces, preferably on calm days with minimal wind. An empty park or open field is ideal. You want room to make mistakes without the consequence of hitting something expensive or hurting someone.
Start by just practicing takeoff, hover, and landing. Get comfortable with how responsive the sticks feel before trying to move through the air. Then practice gentle, slow movements in each direction individually. Forward and back, left and right, rotating in place, and gaining or losing altitude. Do each of these slowly and deliberately until they feel natural, then combine them gradually.
The most common beginner mistake is moving the drone too fast too soon and then overcorrecting when something feels wrong. Slow, deliberate inputs produce much more stable and watchable footage than quick, reactive ones.
How to Get Footage That Actually Looks Good
Most beginners are surprised to discover that flying well and shooting well are two different skills. You can become a confident pilot and still produce footage that is technically stable but compositionally boring. Here are the principles that make aerial footage worth watching.
Movement should always feel intentional. The shots that look best from a drone are the ones where the camera is moving steadily in one direction and the landscape beneath it is unfolding naturally. A slow, steady forward push over an interesting landscape. These movements work because they feel deliberate.
Avoid jerky, unmotivated changes in direction. If the footage feels like the pilot is searching for something to look at, the viewer feels that discomfort too. Know what you want to see before you lift off, and fly to see it.
Golden hour, the period of roughly thirty to forty-five minutes after sunrise and before sunset, is even more dramatic from the air than it is from the ground. The warm, directional light rakes across the landscape and reveals texture and depth that flat midday light completely flattens out. If you want your footage to look cinematic without doing much work in post-production, choose your flying times around the light.
Fly low when it is safe and legal to do so. Beginners often fly as high as possible immediately, which produces an interesting overview but lacks the sense of motion and immediacy that lower flights create. At thirty feet, the ground moves past quickly. At three hundred feet, everything feels static and distant. Both perspectives have their uses, but low-altitude footage often feels more alive.
A Note on DJI’s Dominance in the Market
It would be dishonest to write a beginner drone guide in 2026 without addressing the elephant in the room. DJI holds a market share of over 90 percent in the consumer drone space, and for good reasons. Their drones are reliable, their software ecosystem is polished, their customer support infrastructure is the most developed in the industry, and their feature-to-price ratio at every level of their lineup is genuinely difficult to match.
There are other manufacturers worth knowing about. Potensic makes beginner-friendly drones at price points that undercut DJI significantly, and the ATOM SE in particular delivers a respectable beginner experience for less money. Autel Robotics makes capable drones that some creators prefer on principle. But at the beginner level specifically, the DJI ecosystem, particularly the DJI Fly app and the way it integrates with every camera setting, shooting mode, and flight function in a clean, intuitive interface, is hard to beat.
For a deep, ongoing look at real-world drone reviews from someone who flies for a living, The Drone Girl covers the consumer drone market in exhaustive detail and is one of the most trusted independent resources for beginners trying to navigate purchase decisions. And for a more technical, side-by-side look at how drone cameras compare in real shooting conditions, DPReview’s camera comparisons are among the most rigorous product evaluations published anywhere online.
Choosing the Right Drone Based on Who You Are
If your budget is under $250 and you want the absolute lowest-friction entry point into drone photography, the DJI Neo 2 is the right choice. It launches from your palm, tracks you automatically, and shoots 4K footage that is more than adequate for social media. Know that you are trading image quality and wind resistance for convenience and price.
If your budget is around $300 and you want a proper drone experience with GPS stability, a three-axis gimbal, and 4K video you can be genuinely proud of, start with the DJI Mini 4K and buy the Fly More Combo. It will teach you to fly well and produce footage that surprises people who see it.
If your budget reaches $440 and you create content primarily for Instagram Reels or TikTok and want a camera that matches much more expensive drones, the DJI Flip hits an image quality level that is hard to match at this price. Understand that obstacle avoidance is limited to forward and back, and plan your flying accordingly.
If you are willing to invest around $760 and you want a drone that combines excellent safety features with outstanding image quality and will grow with you for years without feeling limiting, the DJI Mini 4 Pro is the most complete beginner drone available. It is genuinely the one that most people who are serious about aerial photography should start with.
If budget is not the primary concern and you want the very best image quality in a sub-250g body, the DJI Mini 5 Pro at $799 delivers 1-inch sensor quality in a package that slips into a jacket pocket. The footage it captures is indistinguishable from professional aerial work in most viewing contexts.